
Single sign-on (SSO) is a session and user authentication service that permits a user to use one set of login credentials.
Summize supports OAuth 2.0 and OpenID Connect (OIDC) for Single Sign-On (SSO) authentication.
This easy-to-follow guide includes the step-by-step process you need to set up Azure SSO on your Summize account.
Follow each step as numbered below until your Azure AD SSO set up is complete and it shows as an authentication provider (as seen on the last page of this guide).
Your Implementation Manager will require your Client ID, Client Secret Value and your domain (which is an https link under "Endpoints") in order to configure SSO. The steps below outline how to retrieve this information and any additional steps.
1. Get your Redirect URI
Our implementation team will provide a code that you will need to paste into Redirect URI tab (point 3 of this guide).
The code will appear in a similar format to https://identity.summize.com/signin-cf04f3b1-b9a3-41ad-be3b-abc83d65b567.

2. Add a new App Registration in your Azure Active Directory instance
In the Azure Active Directory portal, you will see a list under “Manage” on the left hand side. Click “App Registrations”.

3. Register a new application and paste the code we provided earlier
First enter a name into the name tab at the top (this can be changed later).
Now, navigate to the “Redirect URI” section at the bottom, then paste the code we provided into the input box beside “Web”.

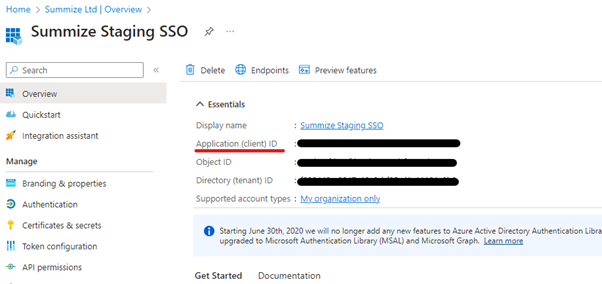
4. Take note of the Application (Client) and Directory (tenant) IDs that have now been generated as they will be required by Summize Ltd to finalise your SSO setup.
Note: Your domain (which is an https link under "Endpoints") is also required to complete your SSO set up.

5a. Click on the “Certificates & Secrets” tab and then on “Client secrets”

5b. Then click “+ New client secret” and fill in the required information. We recommend choosing one year as your timeline for expiry.

5c. Now, copy the code under “Value”
When you complete the process of adding a new client secret, the details will appear under the tab.
Note: The code under “Value” must be copied immediately as the complete code will be hidden once you leave that tab.
Once copied, share this code with your dedicated Implementation Manager at Summize Ltd as well as the Application (Client) ID from point 4 above.

6a. Click on the “API permissions” tab to access the delegated permission page and add the following permissions on the bottom right corner:
- Email
- Offline access
- OpenID
- Profile

6b. Grant admin consent and click “Yes” to complete the process


7. Once you’ve granted access to Summize Ltd, you should see “Granted for Summize Ltd” under the status tab

8. Finally, make sure you share the Application Id, Tenant Id and Client Secret Value with your Summize Implementation Manager as that information is vital to complete your SSO setup.
Once your Summize Implementation Manager has configured your SSO, you can log in to Summize, click on “Users & Permission”, select Summize SSO under the “Authentication Provider”, type in the email address of the user and click on “Confirm” to complete the process.

Additional Info: Restricting SSO Apps in Azure AD
When the Summize SSO app was registered, an additional Enterprise Application should have been created automatically by Azure. This application allows you to restrict access to the Summize Application by either user, group or role.
By default, the application will allow any Azure AD user to authenticate to the Summize Application, however access to the application depends on a user having been setup through the ‘Users and Permissions’ menu item.
To restrict access from Azure AD:
From your Azure AD search for the Summize SSO application. You will need the Application ID (underlined in Red), copy this value to the clipboard.
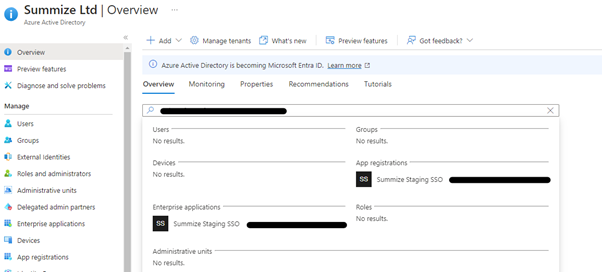
From the Azure AD main screen, paste the Application Id into the search bar:
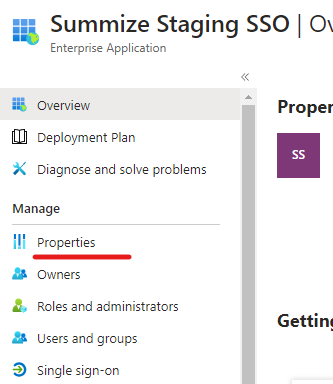
Select the Enterprise Application and under the ‘Manage’ menu block, select the ‘Properties’ option:
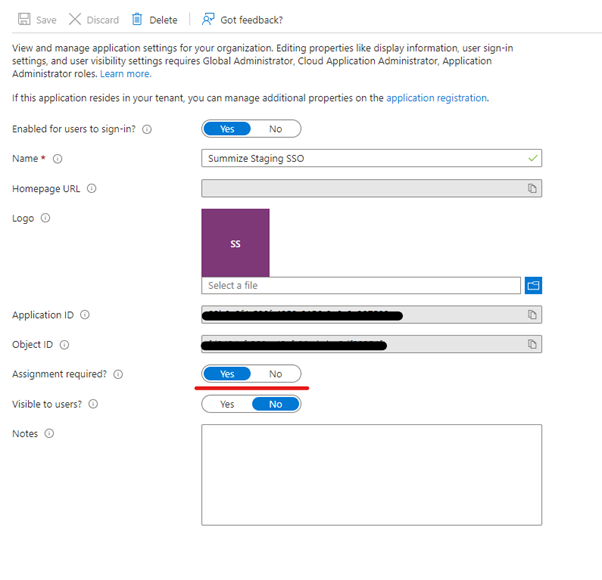
From this screen, change the ‘Assignment Required’ to ‘Yes’ and click ‘Save’.
Then under the ‘Manage’ menu block, select the ‘Users and Groups’ option. From this screen, you can add the users and/or groups that will have access to the Summize Application.
For additional information or support, please contact your dedicated Implementation Manager.
You may also download the guide above as a PDF document